아느로이드 DrawerLayout
좌측 상단의 네비게이션 버튼을 누르면 좌측에서 메뉴가 나타나는 UI 이다.
대부분이 구현되어 있으므로 필요한 부분만 변경해서 사용한다.
Navigation Drawer Activity를 선택한다.

구조
activity_main.xml 은 <include>와 nav_view 로 구성되어 있다.
<include>는 다른 layout을 포함시키는 요소인데 프래그먼트가 교체되는 화면 부분에 해당한다.
nav_view는 좌측에서 나타나는 메뉴에 해당한다.
nav_view
좌측에서 나타나는 메뉴를 관리하는 view이다

activity_main.xml 의 <include>
<include> 는 다른 layout 파일을 포함시키는 요소이다.
여기에서는 app_bar_main.xml 을 포함하고 있다.
이 부분에는 상단에 툴바가 설정되어 있고 하단에는 FloatingActionButton이 있다.
그리고 중간에 <include>가 있는데 이 부분이 프래그먼트를 표시하는 부분이 된다
app_bar_main.xml의 <include>
app_bar_main.xml 의 include는 content_main.xml이 설정되어 있다.
이 부분에는 fragment가 존재하며 이 fragment 에 다른 Fragment를 표시하여 화면을 교채하는 역할을 하게 된다.
Controller 설정
전에는 Controller가 없어서 개발자가 직접 구현을 해야 했지만 지금은 이 Controller에 Fragment 들만 셋팅해주면 된다.
nav_host_fragment
content_main.xml 에 있는 Fragment 이다.
이 Fragment는 Controller의 역할을 해주는데 여기에 navGraph 라는 속성이 있다.
이 속성에는 Controller 가 관리할 Fragment를 등록해 놓은 xml 을 지정한다.
mobile_navigation.xml
Controller가 관리할 Fragment 들을 등록하는 xml 파일이다.
이 파일에 Fragment를 등록할 때 설정하는 id 가 매우 중요하다.
좌측에서 나타나는 메뉴를 클릭했을 때 클릭한 메뉴의 id와 동일한 id가 셋팅되어 있는 fragment가 화면에 나타나게 된다.
이 부분은 모두 설정되어 있기 때문에 개발자는 Fragment를 등록할 때 id를 메뉴의 id와 동일하게만 설정해주면 된다.
activity_main_drawer.xml에 메뉴 id랑 같게 설정
Nabar Fragment 추가
1. fragment 생성
package com.example.drawerlayout.ui.sub
import android.os.Bundle
import android.view.LayoutInflater
import android.view.View
import android.view.ViewGroup
import androidx.fragment.app.Fragment
import com.example.drawerlayout.R
class SubFragment : Fragment() {
override fun onCreateView(
inflater: LayoutInflater,
container: ViewGroup?,
savedInstanceState: Bundle?
): View? {
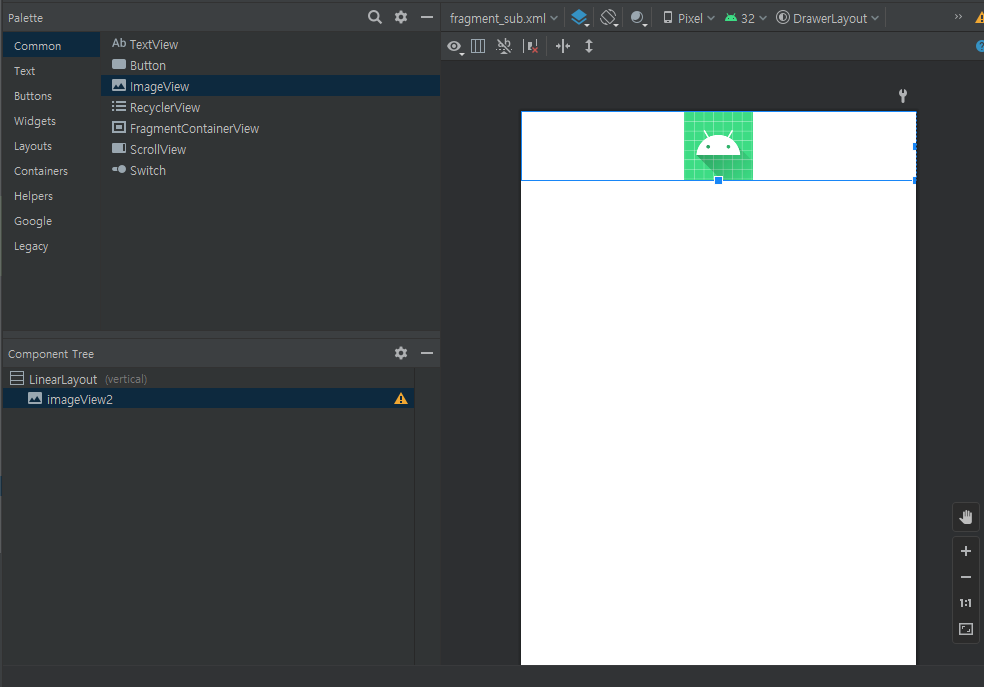
val view = inflater.inflate(R.layout.fragment_sub,null)
return view
}
}
2. activity_main_drawer.xml 메뉴 추가(id = nav_sub)
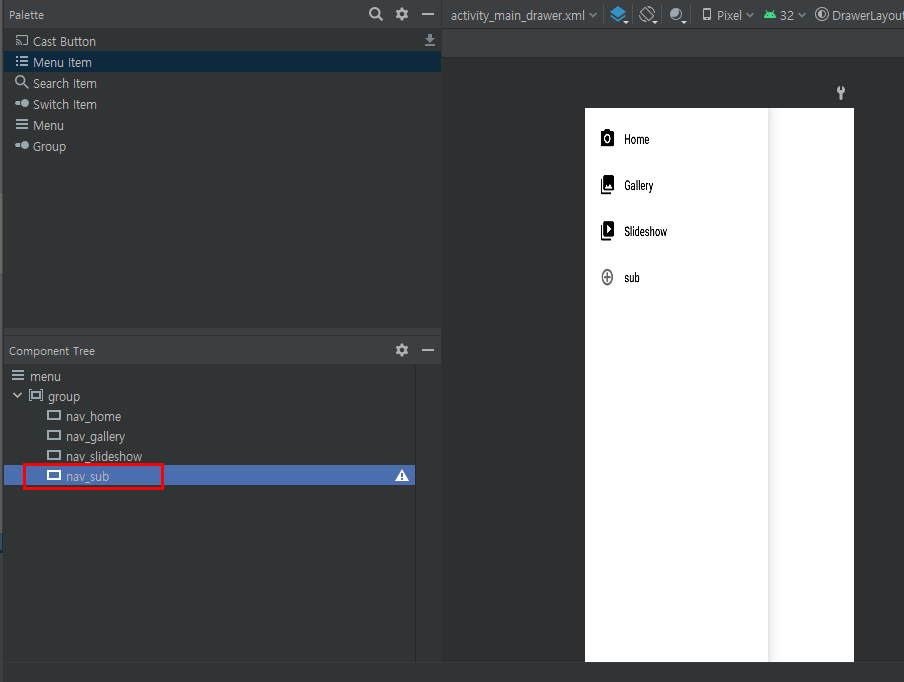
3. mobile_navigation.xml 에서 fragment추가( id = nav_sub중요)
<?xml version="1.0" encoding="utf-8"?>
<navigation xmlns:android="http://schemas.android.com/apk/res/android"
    xmlns:app="http://schemas.android.com/apk/res-auto"
    xmlns:tools="http://schemas.android.com/tools"
    android:id="@+id/mobile_navigation"
    app:startDestination="@+id/nav_home">

    <fragment
        android:id="@+id/nav_home"
        android:name="com.example.drawerlayout.ui.home.HomeFragment"
        android:label="@string/menu_home"
        tools:layout="@layout/fragment_home" />

    <fragment
        android:id="@+id/nav_gallery"
        android:name="com.example.drawerlayout.ui.gallery.GalleryFragment"
        android:label="@string/menu_gallery"
        tools:layout="@layout/fragment_gallery" />

    <fragment
        android:id="@+id/nav_slideshow"
        android:name="com.example.drawerlayout.ui.slideshow.SlideshowFragment"
        android:label="@string/menu_slideshow"
        tools:layout="@layout/fragment_slideshow" />

    <fragment
        android:id="@+id/nav_sub"
        android:name="com.example.drawerlayout.ui.sub.SubFragment"
        android:label="Sub"
        tools:layout="@layout/fragment_sub" />
</navigation>
4. MainActivity에서 appBar 추가
강조
appBarConfiguration = AppBarConfiguration(
    setOf(
        R.id.nav_home, R.id.nav_gallery, R.id.nav_slideshow,R.id.nav_sub
    ), drawerLayout
)
package com.example.drawerlayout

import android.os.Bundle
import android.view.Menu
import com.google.android.material.snackbar.Snackbar
import com.google.android.material.navigation.NavigationView
import androidx.navigation.findNavController
import androidx.navigation.ui.AppBarConfiguration
import androidx.navigation.ui.navigateUp
import androidx.navigation.ui.setupActionBarWithNavController
import androidx.navigation.ui.setupWithNavController
import androidx.drawerlayout.widget.DrawerLayout
import androidx.appcompat.app.AppCompatActivity
import com.example.drawerlayout.databinding.ActivityMainBinding

class MainActivity : AppCompatActivity() {

    private lateinit var appBarConfiguration: AppBarConfiguration
    private lateinit var binding: ActivityMainBinding

    override fun onCreate(savedInstanceState: Bundle?) {
        super.onCreate(savedInstanceState)

        binding = ActivityMainBinding.inflate(layoutInflater)
        setContentView(binding.root)

        setSupportActionBar(binding.appBarMain.toolbar)

        binding.appBarMain.fab.setOnClickListener { view ->
            Snackbar.make(view, "Replace with your own action", Snackbar.LENGTH_LONG)
                .setAction("Action", null).show()
        }
        val drawerLayout: DrawerLayout = binding.drawerLayout
        val navView: NavigationView = binding.navView
        val navController = findNavController(R.id.nav_host_fragment_content_main)
        // Passing each menu ID as a set of Ids because each
        // menu should be considered as top level destinations.
        appBarConfiguration = AppBarConfiguration(
            setOf(
                R.id.nav_home, R.id.nav_gallery, R.id.nav_slideshow,R.id.nav_sub
            ), drawerLayout
        )
        setupActionBarWithNavController(navController, appBarConfiguration)
        navView.setupWithNavController(navController)
    }

    override fun onCreateOptionsMenu(menu: Menu): Boolean {
        // Inflate the menu; this adds items to the action bar if it is present.
        menuInflater.inflate(R.menu.main, menu)
        return true
    }

    override fun onSupportNavigateUp(): Boolean {
        val navController = findNavController(R.id.nav_host_fragment_content_main)
        return navController.navigateUp(appBarConfiguration) || super.onSupportNavigateUp()
    }
}